If you are registered as a seller or service provider on the Government e-Marketplace (GeM), then keeping your Seller Profile updated is essential for your account verification, catalog approval, and tender participation.
A complete Seller Profile (100% completion) helps you:
✅ Build buyer trust
✅ Get visibility in searches
✅ Participate in tenders and reverse auctions
✅ Receive faster payments
This guide will help you Update Seller Profile on GeM Portal 2025, covering each section step-by-step with easy explanations and real examples.
If you are not yet registered, start with this guide:
👉 How to Register on the GeM Portal: Step-by-Step Guide for Sellers (2025)
Table of Contents
Main Sections to Update Seller Profile on GeM Portal 2025
Your GeM Seller Profile is divided into five main sections:
- Business Profile
- Vendor Assessment
- Seller Panel (Reseller Panel)
- Account Settings
- User Management
Let’s go step-by-step
1. Business Profile
The Business Profile is the foundation of your GeM Seller account. It includes all legal, tax, and operational information about your business.
There are mandatory and optional subsections:
Mandatory:
- Business PAN Validation
- Business Details
- Additional Details
- Office Locations
- Bank Accounts
- Tax Assessment
- e-Invoicing
- MSME
- Beneficial Ownership Compliance
Optional:
- Logistics
- TAN Validation
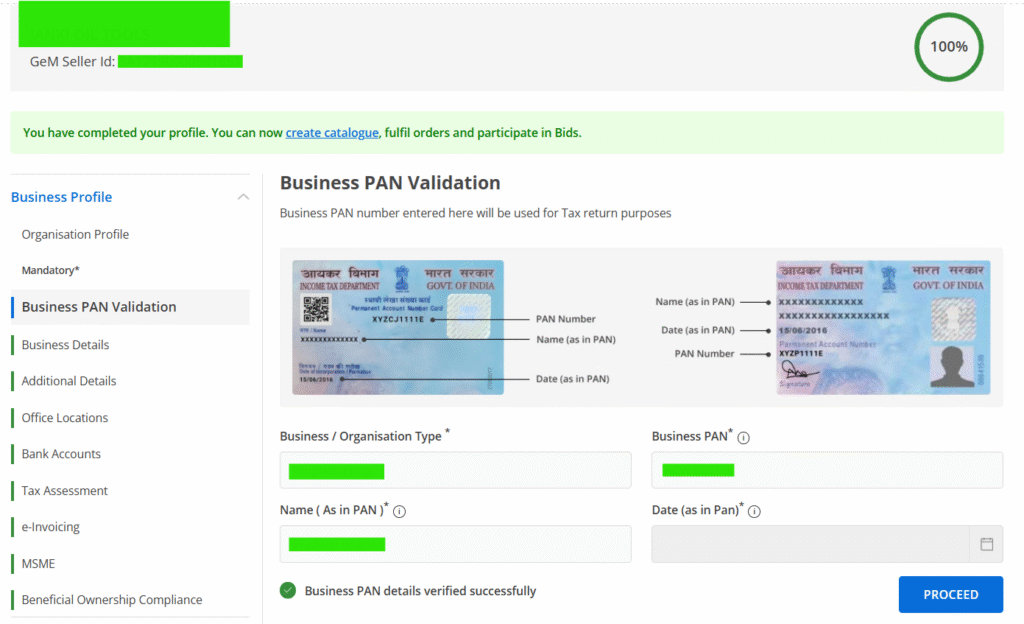
Business PAN Validation
This is the first step to verify your business identity.
You’ll see these fields:
- PAN Number: Enter your valid 10-digit business PAN.
- Business Type: Select from the dropdown (Proprietorship, Partnership, Private Limited, LLP, etc.).
- PAN Name: The system fetches this automatically once validated.
Example: If your company is “My Avinya Pvt. Ltd.” and your PAN is AAACJ1234K, the name will appear automatically once verified.
Business Details
This section fetches your registered information like:
- Legal Name
- Date of Incorporation
- Registered Address
- Nature of Business
Check all details carefully. If something is incorrect, contact the Income Tax Department for PAN correction before proceeding.
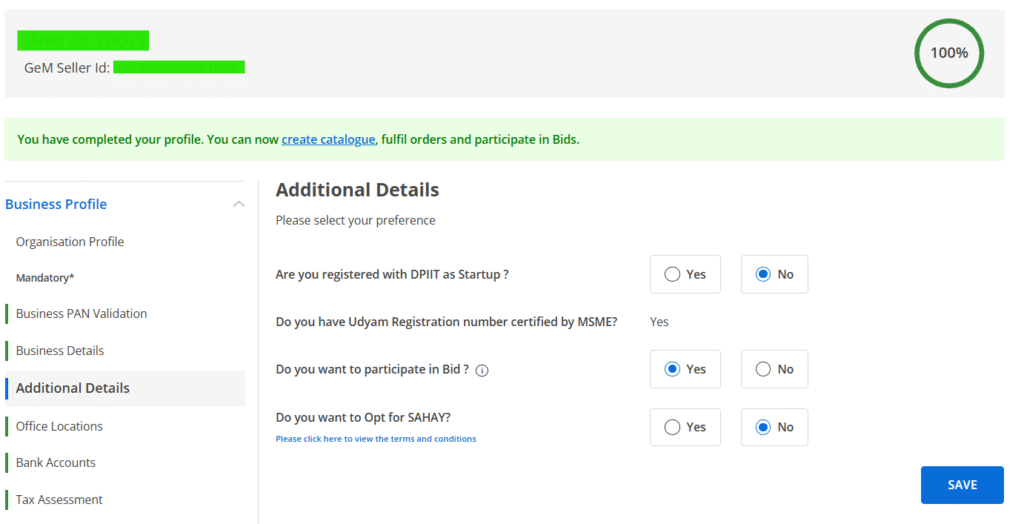
Additional Details
This is one of the most important subsections when you Update Seller Profile on GeM Portal 2025. It helps the portal determine your eligibility for tenders, exemptions, and schemes.
You’ll see several Yes/No questions:
1.Are you registered with DPIIT as a Startup?
If your company is recognized under the Startup India program, select Yes and upload your DPIIT Certificate.
If not, select No.
Related Blog:
GeM Startup Runway 2025: Complete Guide, Benefits & How to Register for Startups
2. Do you have Udyam Registration number certified by MSME?
If you are an MSME, select Yes and enter your Udyam Registration Number.
GeM automatically verifies your data from the MSME portal.
If you are not registered, select No. You can still apply later.
Related Blog:
GeM MSME Benefits 2025: Udyam Registration, Exemptions & Buyer Preference
Udyam Registration Certificate Step-by-Step Guide 2025 – Complete MSME Online Process
3. Do you want to participate in Bid?
Select Yes if you want to participate in tenders, RAs (Reverse Auctions), or service bids on GeM.
If you only want to publish products for visibility, you can select No, but this will restrict you from bidding.
💡 Tip: Always select Yes — bidding is the main purpose of GeM.
4. Do you want to opt for SAHAY?
SAHAY is an RBI-approved financing scheme where sellers can get short-term loans against GeM orders.
If you’re interested in working capital, select Yes.
If not, choose No — it’s optional.
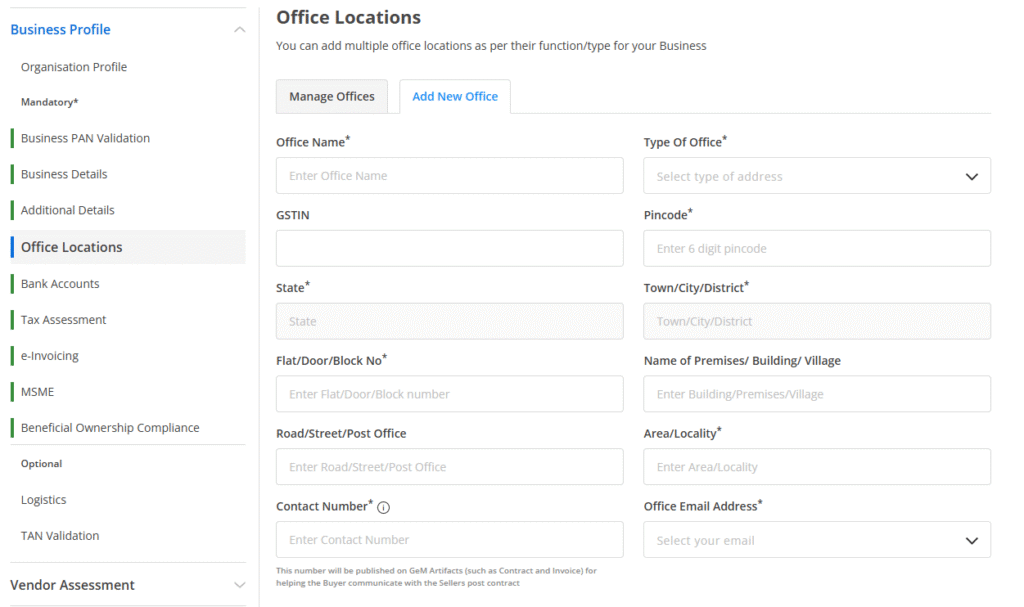
Office Locations
You can add one or more business locations.
Click Add New Office, enter address details, select office type, and save.
Fields include:
- Office Type: Registered, Factory, or Branch
- Address Line 1 and 2
- State and PIN Code
- GSTIN (if available)
- Contact Number
Example:
If your registered office is in Ahmedabad but your manufacturing plant is in Vadodara, add both separately.
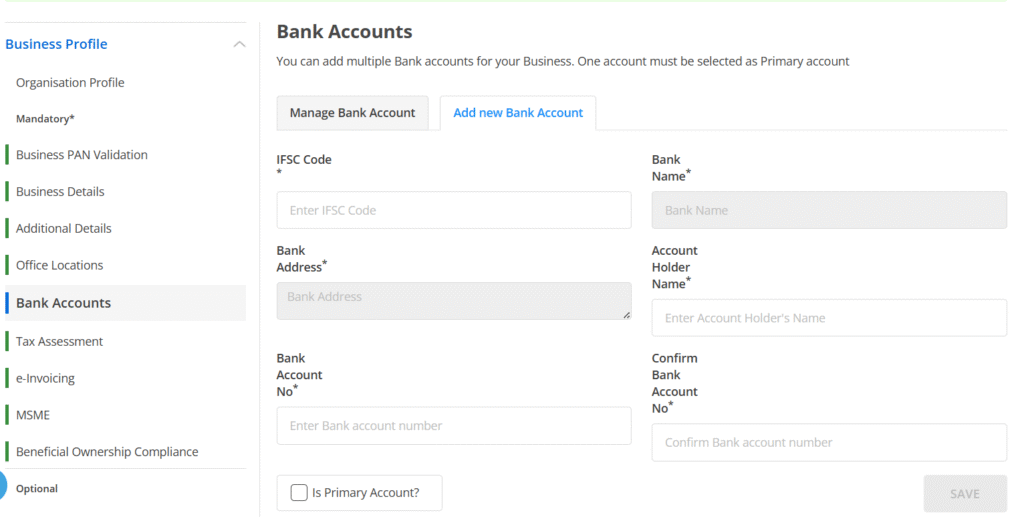
Bank Accounts
Here you can add your official bank details.
Make sure the account name matches the PAN name.
Fields required:
- Account Holder Name
- Bank Name & IFSC Code
- Account Number (enter twice)
- Branch Address
After submission, GeM verifies your account through PFMS.
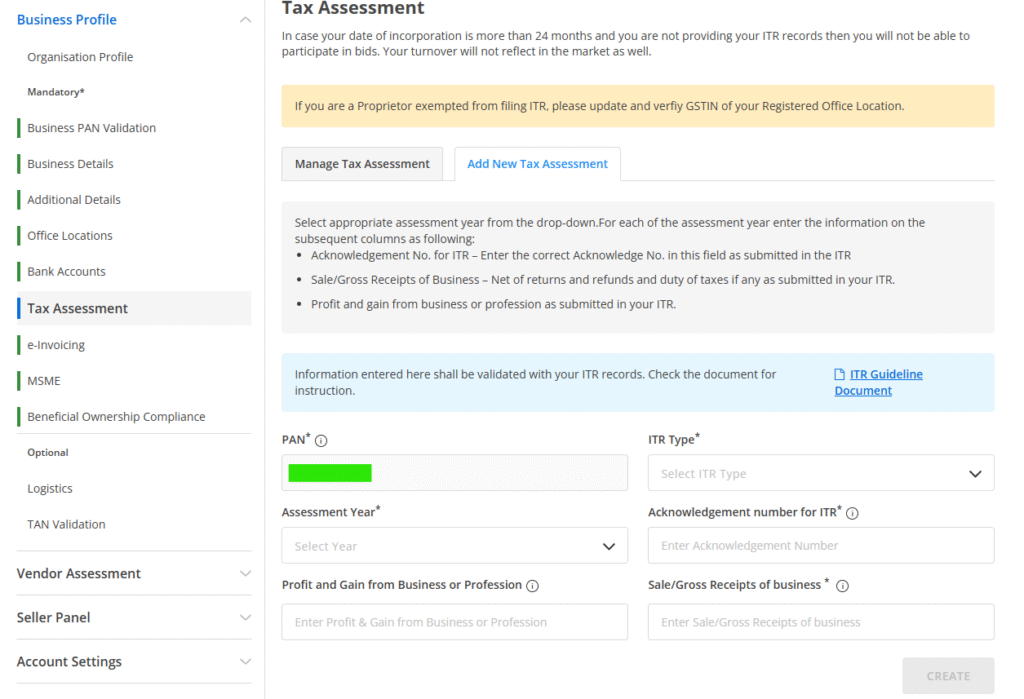
Tax Assessment
This section helps GeM verify your financial credibility.
You’ll need to enter your ITR filing details for the last financial year.
Fields include:
- Assessment Year
- Total Turnover
- ITR Acknowledgment Number
Example:
If you filed ITR for FY 2023–24, your assessment year will be 2024–25.
e-Invoicing
If your business turnover exceeds ₹10 crore and you generate e-invoices under GST, select Yes.
Otherwise, select No.
Tip: If you’re unsure, ask your accountant — most MSMEs below ₹10 crore turnover should select No.
MSME Section
If you selected Yes in Additional Details for MSME, this section will automatically fetch your Udyam details.
Ensure that your Udyam data matches your business name, PAN, and GSTIN.
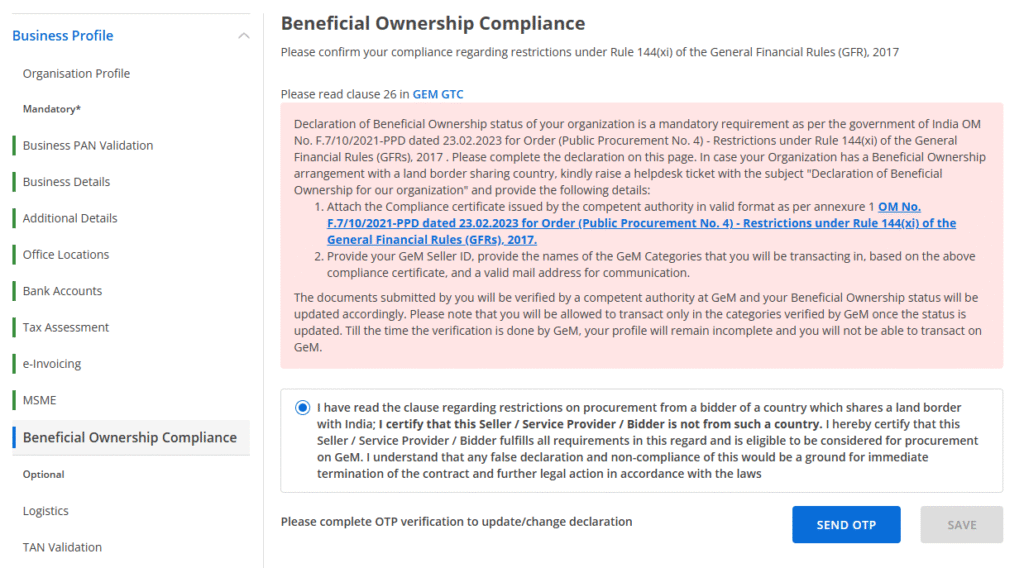
Beneficial Ownership Compliance
This section asks if your company has ownership links with countries sharing a land border with India.
Select No if not applicable.
If your organization is registered in such a country, you’ll need prior government approval.
Logistics (Optional)
You can enter your logistics partner details or delivery coverage zone.
This helps buyers understand your service reach.
TAN Validation (Optional)
If you have a Tax Deduction Account Number, enter it here.
This is mainly for larger enterprises or service providers who deduct TDS.
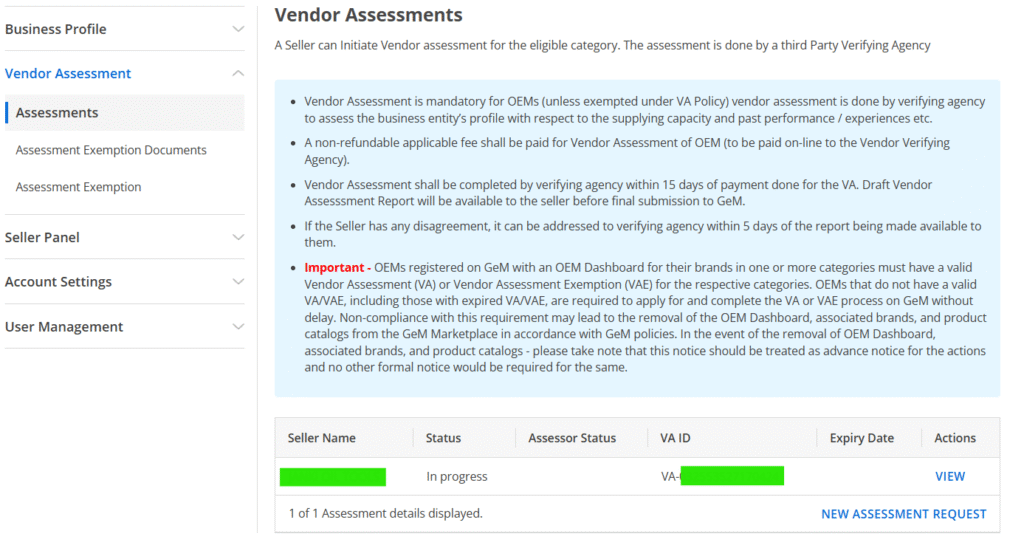
2. Vendor Assessment
The Vendor Assessment (VA) process is one of the most critical steps when you Update Seller Profile on GeM Portal 2025.
It validates your manufacturing capability, financial stability, and quality standards.
Without this assessment, OEMs (Original Equipment Manufacturers) cannot publish their catalogs.
This section has three important sub-sections:
- Assessments
- Assessment Exemption Documents
- Assessment Exemption
Assessments
This sub-section displays all your ongoing and completed assessment requests.
It also allows you to raise a new assessment request.
Steps to Create a New Assessment Request:
- Click on “New Assessment Request”.
- Choose the Assessment Agency (generally Quality Council of India – QCI).
- Fill in your business details such as:
- Type of manufacturing unit
- Product category you wish to assess
- Factory address and contact details
- Annual production capacity
- Machinery and manpower details
- Upload required documents like:
- Company incorporation certificate
- PAN, GST, and ITR proof
- Product catalog or technical sheet
- Factory photographs
- Pay the applicable assessment fee online through GeM payment gateway.
Once submitted, the agency will conduct an online and/or physical verification and issue a Vendor Assessment Certificate valid for 3 years.
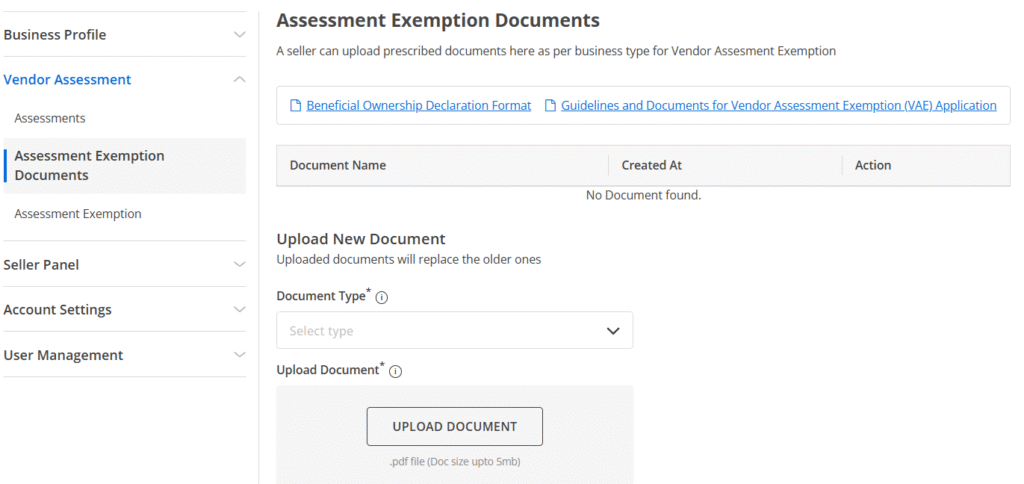
Assessment Exemption Documents
This tab is for uploading supporting documents if your company is eligible for an assessment exemption.
Some sellers are exempt from vendor assessment if they fall under any of these categories:
✅ Central or State Government Departments
✅ Public Sector Undertakings (PSUs)
✅ Manufacturers having BIS Certification
✅ Companies having valid NSIC or MSME Registration under Udyam
Steps to Upload Exemption Documents:
- Go to Assessment Exemption Documents tab.
- Click “Add New Document.”
- Select document type from dropdown (BIS, NSIC, Udyam, PSU ID, etc.).
- Upload the certificate in PDF format (Max size 2 MB).
- Click Save & Submit.
Example:
If you already have a BIS certification for your product (like IS-14350:2021 for industrial pumps), you can upload it here and skip the full Vendor Assessment.
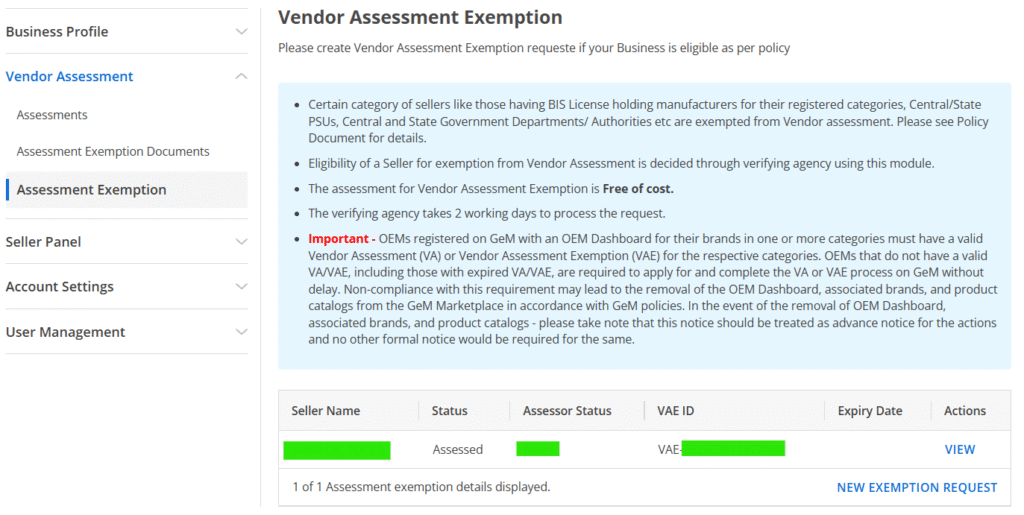
Assessment Exemption
Once you’ve uploaded your exemption documents, you can apply for formal exemption approval in this sub-section.
Steps to Apply for Exemption:
- Click “New Exemption Request.”
- Select the exemption type (for example, BIS Certificate or PSU Authorization).
- Add remarks or justification.
- Attach supporting document (if not already added).
- Submit for approval.
Key Tips for Vendor Assessment Section
✅ If you are a manufacturer (OEM) → You must complete Vendor Assessment.
✅ If you are a reseller or trader → You can skip it, but you’ll need OEM authorization.
✅ If you are BIS or NSIC certified → Apply for Assessment Exemption instead.
✅ Keep your certificates valid and renewed — expired assessment can block catalog publishing.
3. Seller Panel
The Reseller Panel allows resellers to sell OEM products officially.
Steps:
- Go to Seller Panel → Reseller Panel
- Choose Category Type (Product or Service)
- Select Category Level (L1 to L4)
- Send Reseller Authorization Request
Example:
If you’re a distributor selling “Havells Fans,” request reseller authorization from Havells India.
4. Account Settings
The Account Settings section on the GeM Portal allows sellers and service providers to manage their login credentials, Aadhaar verification, communication email, and account closure requests.
Many sellers ignore this section — but keeping it updated ensures smooth login, strong security, and uninterrupted communication with buyers.
There are five main sub-sections inside Account Settings:
- Seller Profile
- Update Aadhaar
- Change Password
- Change Email
- Close Account
Seller Profile
This subsection displays your basic seller identity as registered on GeM.
It shows the data fetched from your registration, such as:
- Seller Name
- Registered Email ID
- Mobile Number
- Role Type (Primary User or Secondary User)
You cannot directly edit your name or mobile number here — these are system-verified.
If you’ve changed your official email or contact, you must do it via the Change Email tab.
Example:
If your organization name is “Avinya Traders LLP” and your registered email is info@avinyatraders.in, the same will appear here.
If you change your business email to sales@avinyatraders.in, it must be updated under “Change Email” to reflect correctly.

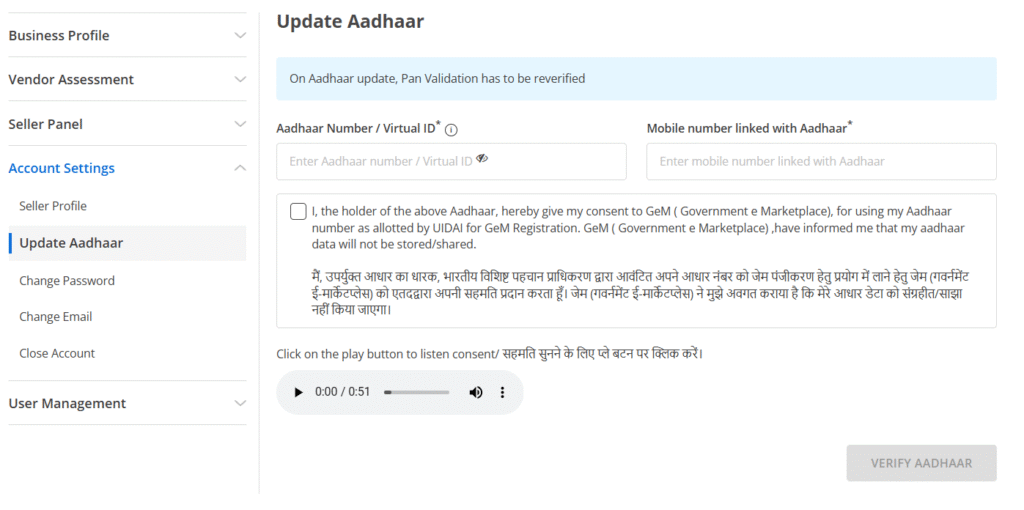
Update Aadhaar
This tab is used to update or re-verify the Aadhaar number linked to your GeM account.
The Aadhaar is used to verify your identity and prevent unauthorized use of the seller account.
Step-by-Step Process:
- Click on Update Aadhaar tab.
- Enter your Aadhaar Number or Virtual ID (VID).
- Enter the mobile number linked with your Aadhaar.
- Tick the consent checkbox and click Get OTP.
- Enter the OTP received from UIDAI and submit.
- Once verified, your Aadhaar details will be updated.
Change Password
This option allows you to change your GeM account password anytime for security.
GeM recommends updating your password at least once every 3–6 months.
Steps to Change Password:
- Click on Change Password.
- Enter your current password.
- Enter the new password (must include uppercase, lowercase, numeric, and special characters).
- Confirm the new password.
- Click Submit to save.
If you’ve forgotten your password, click “Forgot Password” on the login screen — GeM will send an OTP to your registered email or mobile for reset.
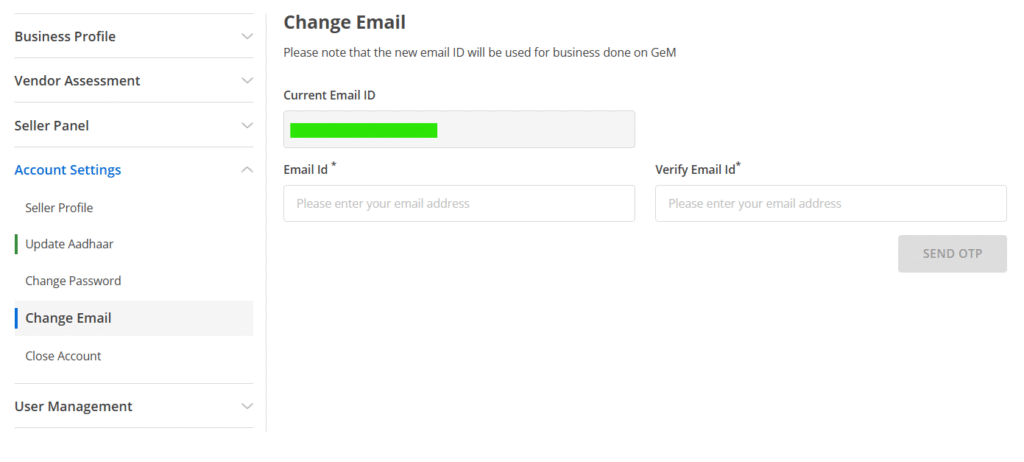
Change Email
If your organization has shifted to a new domain (for example, from Gmail to a custom domain email), you can easily change the registered email ID through this option.
Steps to Change Email:
- Click on Change Email.
- Enter your current registered email ID.
- Enter the new email ID you want to use.
- Click Send OTP to both old and new email IDs.
- Verify both OTPs to confirm ownership.
- The system updates your new email ID instantly.
Close Account
This option is used to permanently close or deactivate your GeM seller account.
However, account closure comes with a few restrictions and precautions.
Important Rules:
- You cannot close your account if any published catalog or active bid exists.
- Before closure, you must validate your registered bank account (for refund of caution money or pending payments).
- Once closed, your account and data cannot be reactivated — you’ll need to register again.
Steps to Close Account:
- Go to Account Settings → Close Account.
- Read the closure warning carefully.
- Validate your bank account (PFMS verification).
- Confirm by clicking “Close My Account.”
5. User Management
The User Management section is one of the most important parts when you Update Seller Profile on GeM Portal 2025.
This feature allows the Primary Seller User to create, assign, and control access for multiple users within the same organization.
In simple words — if your company has different people handling tenders, catalog uploads, payments, or logistics, this section helps you assign separate logins for each of them without sharing your main credentials.
After the GeM 2025 update, this section is now completely separate from Account Settings, making it easier to manage all users in one place.
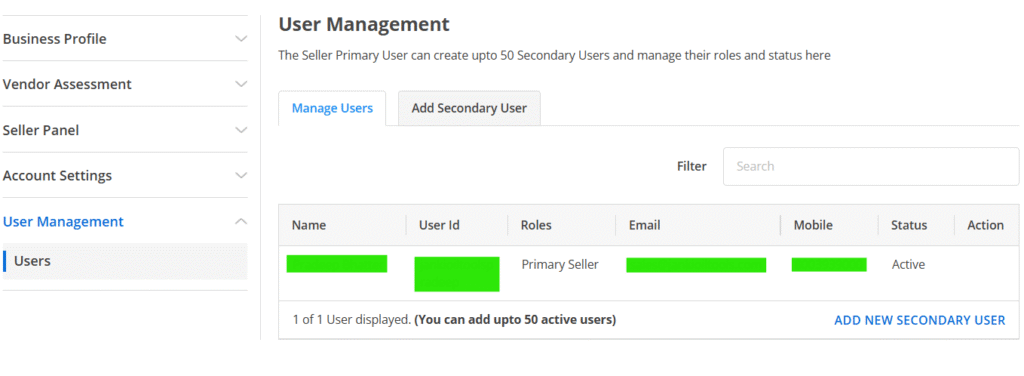
Manage Users
This tab displays a full list of all the Primary and Secondary Users associated with your organization’s GeM account.
It includes the following columns:
| Column | Description |
|---|
| User ID | System-generated unique ID for each user |
| Name / Email ID | The registered email of the user |
| Mobile Number | Contact number linked with user’s login |
| User Role | Defines the permissions (e.g., Bidding, Catalog, Fulfillment) |
| Status | Shows if the user is Active ✅ or Inactive 🚫 |
| Actions | Buttons to Edit, Deactivate, or Reactivate the user |
How to Use Manage Users Tab:
- Review the list of all active users.
- To deactivate a user (e.g., when an employee leaves), click the Deactivate icon.
- To reactivate, click the Reactivate icon beside their name.
- To edit roles, click the Edit icon and update permissions.
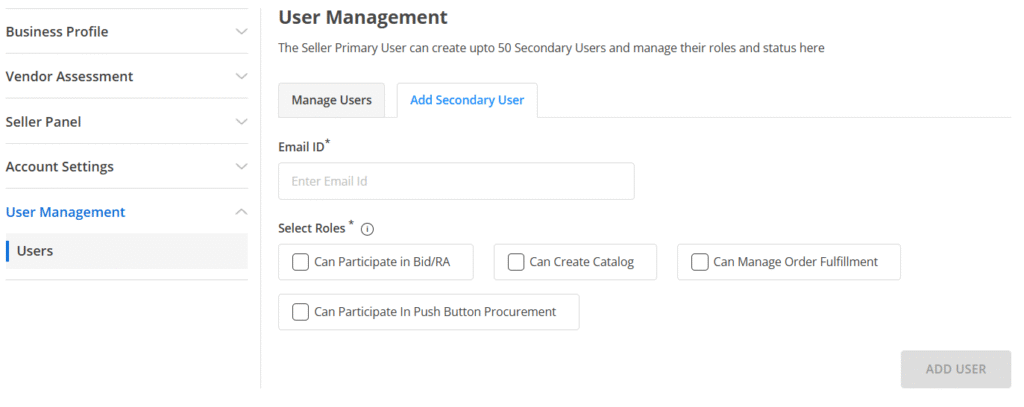
Add Secondary User
This tab allows you to add new users to your GeM Seller account.
You can create up to 50 secondary users under one primary account.
Each user can have customized access rights depending on their job role.
Step-by-Step: How to Add a Secondary User
- Click “Add Secondary User”.
- Enter the Email ID of the new user.
- The person must have access to that email to activate their login.
- Select the role(s) you want to assign.
- Click Submit.
The user will receive an email invitation from GeM to set a password and activate their account.
Available Roles (Choose Carefully)
Each secondary user can have one or more roles, depending on the organization’s needs.
Here are the four options and what each one does:
| Role | Description | Who Should Get It |
|---|
| Can Participate in Bid/RA | Allows user to view, participate, and quote in tenders and Reverse Auctions. | Sales, Tender, or Business Development executives |
| Can Create Product/Service Catalog | Enables user to upload new products or services, edit descriptions, and manage catalogs. | Product or Marketing team |
| Can Manage Order Fulfillment | Gives access to accept orders, update dispatch details, generate invoices, and mark deliveries. | Logistics, Dispatch, or Accounts department |
| Can Participate in Push Button Procurement | Allows user to respond to small-value direct procurement requests by buyers instantly. | Small sales or procurement officers |
Example:
Let’s say your company has:
- Rohit (Sales Manager) – participates in bids and auctions
- Priya (Marketing Executive) – uploads and edits product catalogs
- Ankit (Accounts Executive) – handles invoicing and deliveries
Then:
- Rohit → Select Participate in Bid/RA ✅
- Priya → Select Create Product/Service Catalog ✅
- Ankit → Select Manage Order Fulfillment ✅
This way, each person has their defined access — and your main account remains secure.
GeM Secondary User Creation: Step-by-Step Guide to Add, Activate & Manage Users on GeM
Conclusion
Updating your GeM Seller Profile ensures compliance, trust, and higher visibility.
By completing each section carefully, you’ll build a profile that’s ready for bids, RAs, and bulk orders.
✅ Complete all mandatory sections
✅ Keep documents up to date
✅ Assign proper user roles
✅ Maintain 100% profile score
Once your profile is verified, you’re ready to participate in government tenders confidently.
Disclaimer
All screenshots and details are based on the GeM 2025 interface.
Options may vary depending on your business type and government updates.
For official instructions, visit the GeM Portal.
Excellent guide, step by step explained with screenshots. Very Helpful
Very helpful and content is concisely presented
I followed and was able to successfully complete my task