The Government E Marketplace (GeM) is an official online platform that enables sellers and service providers to offer their products and services directly to government departments, ministries, and PSUs. Whether you’re a manufacturer, startup, or service provider, registering on GeM opens the door to huge business opportunities through government procurement.
In this guide, we’ll walk you through the complete GeM registration process for sellers in 2025, with screenshots, notes, and practical tips to make it simple for you.
Table of Contents
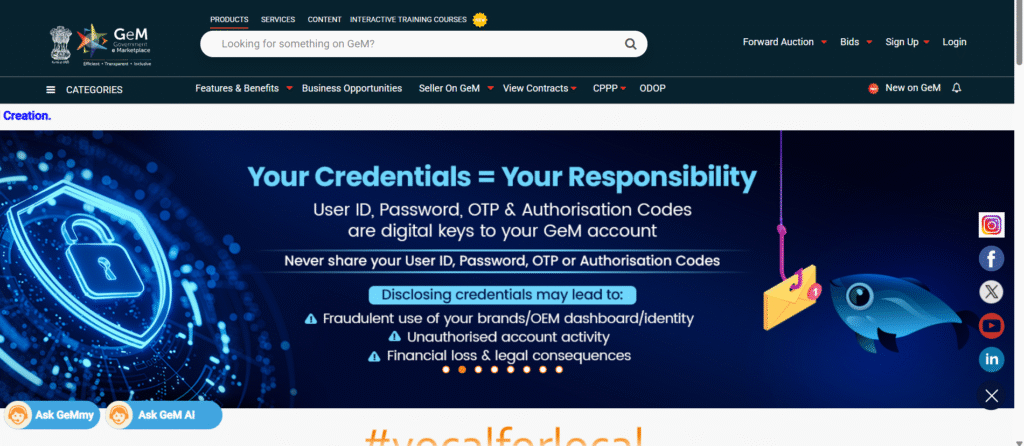
Step 1: Visit the Government E Marketplace (GeM) Official Website
🔗 Go to: https://gem.gov.in/
You’ll land on the homepage of the Government e-Marketplace.
Step 2: Click on ‘Sign Up – Seller/Service Provider’
You’ll find this option in the top right corner of the homepage.
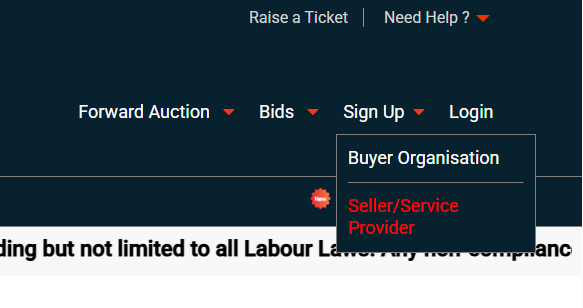
Clicking on this will take you to a three-step registration process.
GeM Registration Process Overview
Once you click on “Seller/Service Provider”, the registration process is divided into 3 main steps:
1. Pre-requisites
2. Terms & Conditions
3. Registration
Step 1: Pre-requisites
Start by choosing your Business / Organisation Type from the dropdown list:
• Proprietorship (Sole owner)
• Firm (Partnership/LLP)
• Company (Private/Public Ltd.)
• Trust/Society
• Government Entity

📌 Note: Once you select your type, a checklist of mandatory documents will appear based on your selection.
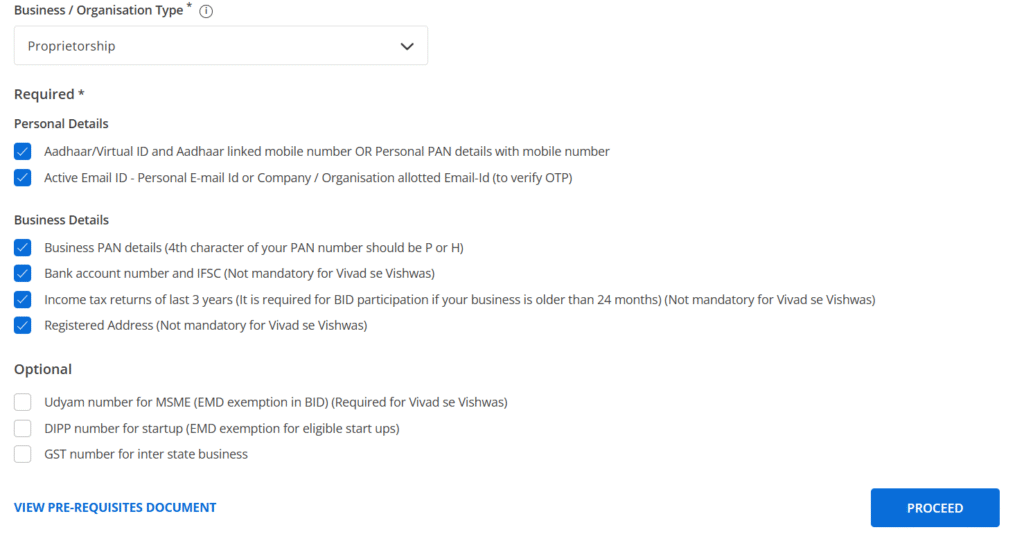
✅ Tip: Keep scanned copies of documents like PAN, UDYAM, GST (if applicable), and bank details ready before starting.
Step 2: Terms & Conditions
You will be shown a downloadable PDF containing General Terms and Conditions of GeM.
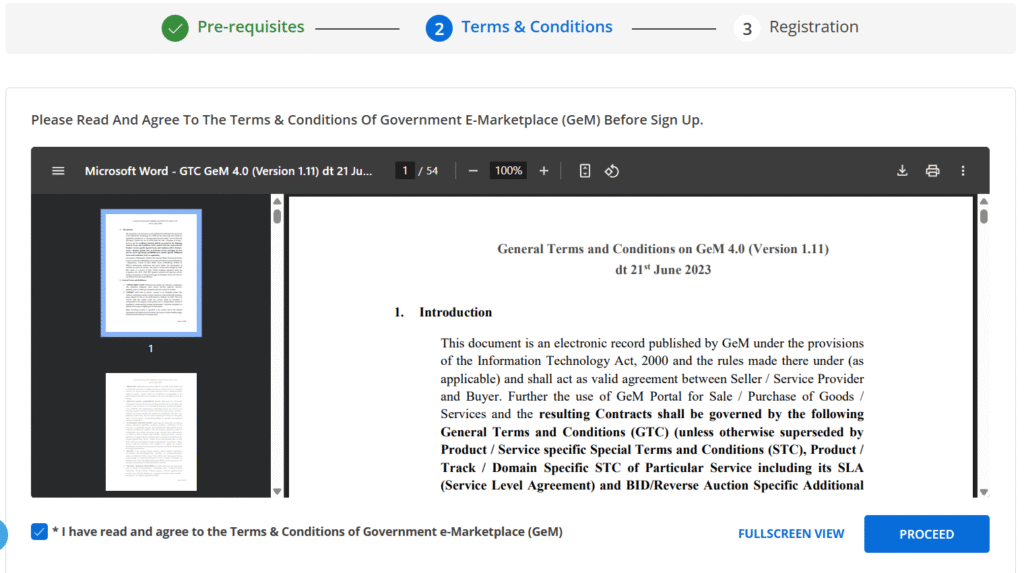
Check the box “I have read and agree…” and click Proceed.
📌 Note: It’s always a good idea to read through the T&Cs at least once to understand compliance requirements.
Step 3: Registration
This is the main step, divided into 4 sub-sections:
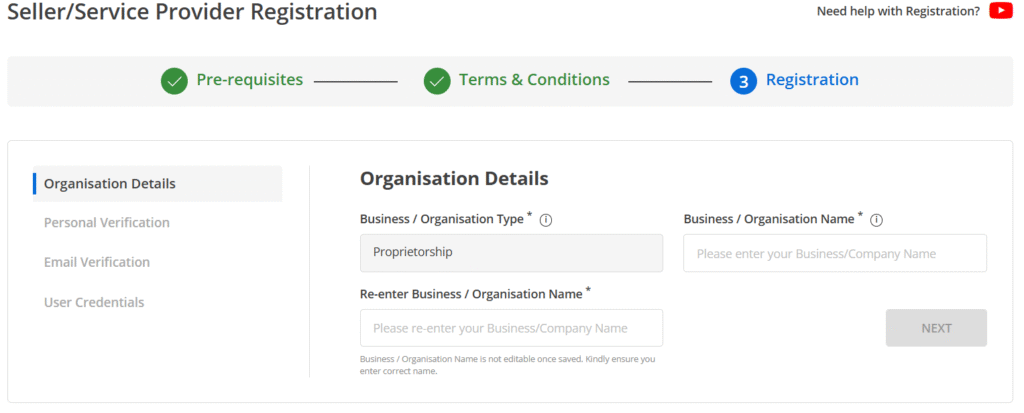
➤ Organisation Details
Provide your business name, type, PAN, address, and other official details.

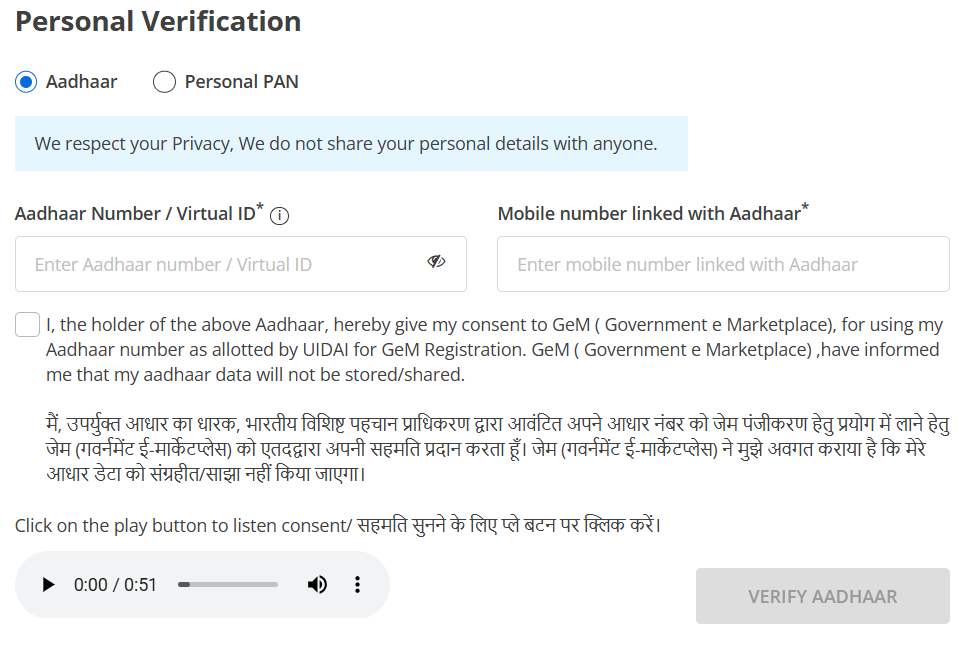
➤ Personal Verification
There are two methods for personal identity verification:
A) Using Aadhaar
• Enter Aadhaar number
• OTP is sent to your registered mobile
• Enter OTP to verify
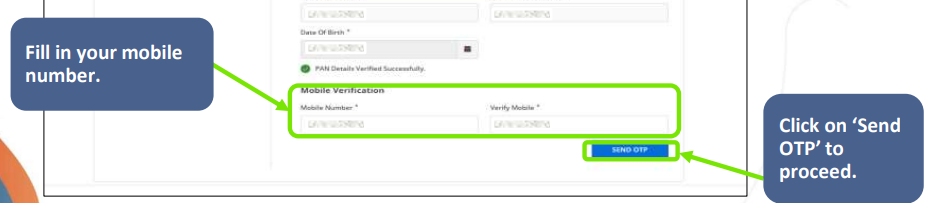
B) Using Personal PAN
• Enter PAN number, name (as per PAN), and date of birth
• OTP will be sent to your mobile number for verification

📌 Note: You can choose either Aadhaar or PAN based on what’s linked with your mobile number.
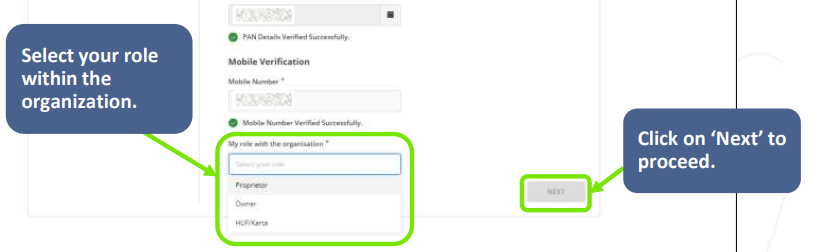
Once your PAN details verified you have to enter your mobile number for verfication.
After OTP verification, you have to choose your role in the organization and click on Next.
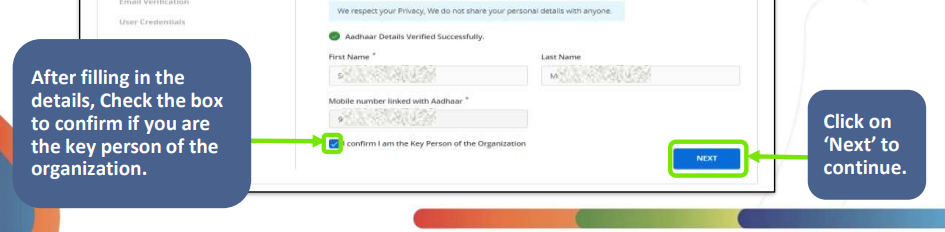
After Aadhar / PAN verfication, you will be asked to fill your personal verification details like email, mobile number etc. Do the same and verify with OTP and go for next.
Note: At this time you will be asked if you are the key person of the organization, check the box and go for next.
After Aadhar / PAN verfication, you will be asked to fill your personal verification details like email, mobile number etc. Do the same and verify with OTP and go for next.
Note: At this time you will be asked if you are the key person of the organization, check the box and go for next.
➤ Email Verification
After successful Aadhaar/PAN verification, you’ll be asked to verify your email address.
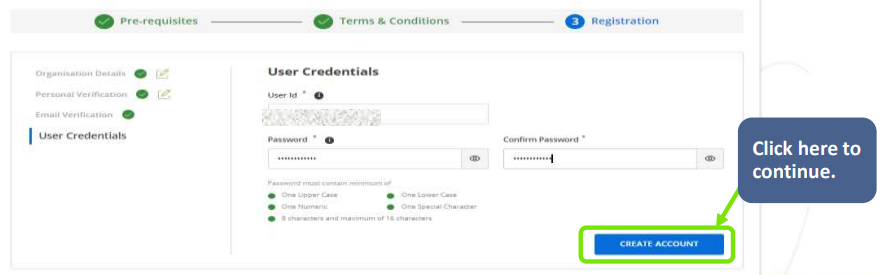
➤ User Credentials
Finally, set your Login ID and Password.
Key Takeaways
• GeM registration is completely free and online.
• Only the authorized person (like Director, Partner, or Proprietor) can register as the Primary Seller.
• OTP-based verification is required for mobile, email, and Aadhaar/PAN.
• No separate registration needed for both seller and service provider.
• The Primary Seller can later add multiple users as Secondary Sellers to manage various tasks.
• MSMEs must provide their Udyam Registration Number.
• Startups must have a valid DIPP number.
• Ensure your ITR details and PAN/Aadhaar match to avoid verification issues.
• Bank details must match the name on the registration documents.
Frequently Asked Questions (FAQs)
Q1: Is GeM registration free?
A: Yes, registering on the Government e-Marketplace is free for all eligible sellers and service providers.
Q2: Is Aadhaar mandatory for seller registration?
A: No. You can now use either Aadhaar or PAN for verification.
Q3: Who can be the Primary Seller?
A: The person who is the authorized signatory of ITR (like owner, director, partner) should register as the Primary Seller.
Q4: Can I update my business details after registration?
A: Yes. You can log into your dashboard and update business or personal details anytime.
Q5: What documents are required during registration?
A:
• PAN and Aadhaar or Personal PAN
• UDYAM or DIPP number (for MSMEs or Startups)
• Address proof of the organisation
• Bank account details
• Active email and mobile
Q6: What is the difference between Primary and Secondary Seller?
A: The Primary Seller is the main account holder. They can create multiple Secondary Sellers and assign roles like bidding, catalog creation, and order management.
Disclaimer
This blog is for informational purposes only. We are not affiliated with the official Government e-Marketplace (GeM) platform. For the latest and official updates, please visit https://gem.gov.in/.
What’s Next?
In our next blog, we will guide you through the steps to update your seller profile on the GeM portal. Stay tuned to make sure your profile is fully optimized and compliant for government procurement!
5 thoughts on “How to Register on the GeM Portal: Step-by-Step Guide for Sellers [2025]”